Quick Start: schedule your first Shopify flash sale
To schedule a flash sale with PriceDip: install the app, click Create task on the Run flash sale card, choose your products, set the discount, pick a revert rule, set the start and end time, then save the task with its status set to Active. Prices change at the start time and revert on their own when the sale ends. The sale is a change to each product’s price and compare-at price, so there is no discount code to share.
Before you start
Section titled “Before you start”- You need a Shopify store and permission to install apps.
- The Free plan covers 50 product variants in total across your active tasks. It can target all products or specific products. For larger sales, or to target collections, tags or product types, see Plans and limits.
- Decide four things up front: which products, how much off, what margin that leaves on each unit and exactly when the sale ends.
1. Install PriceDip
Section titled “1. Install PriceDip”- Open PriceDip on the Shopify App Store and click Install.
- Open the app. It appears under Apps in your Shopify admin.
- On the app Dashboard, follow the onboarding guide.
2. Create a Flash Sale task
Section titled “2. Create a Flash Sale task”-
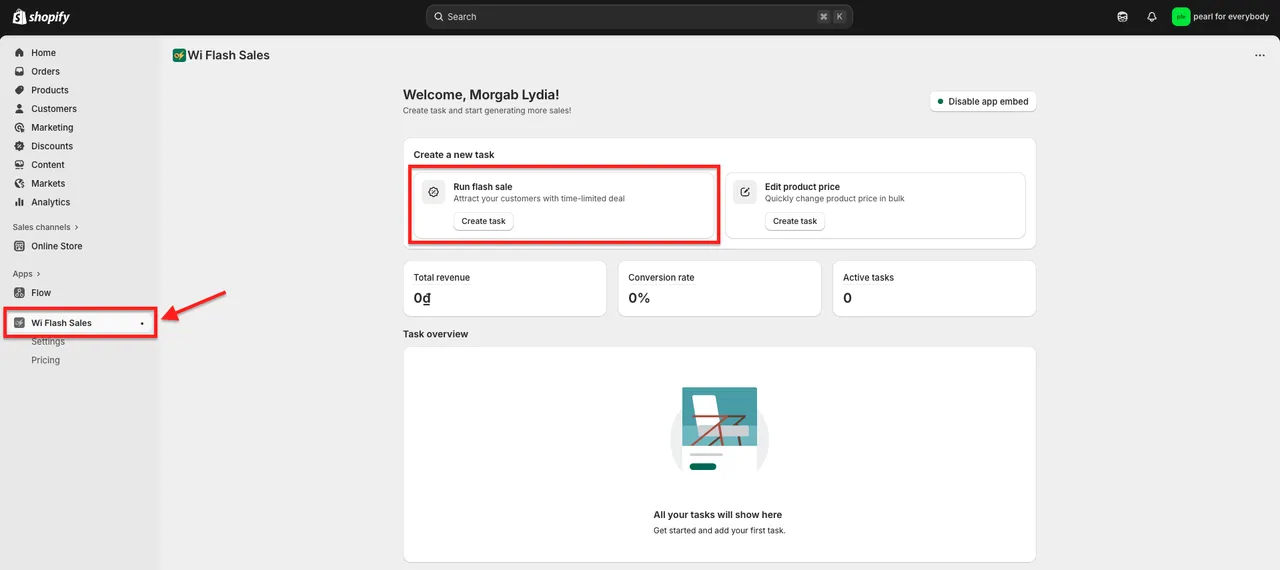
On the app Dashboard, find the Run flash sale card and click Create task.
-
In the Task info card, set the Status. Active means the task is on. Inactive means the task is off.
-
Enter a Name, for example
Spring weekend sale. The name is only there to help you manage your task list. Customers never see it.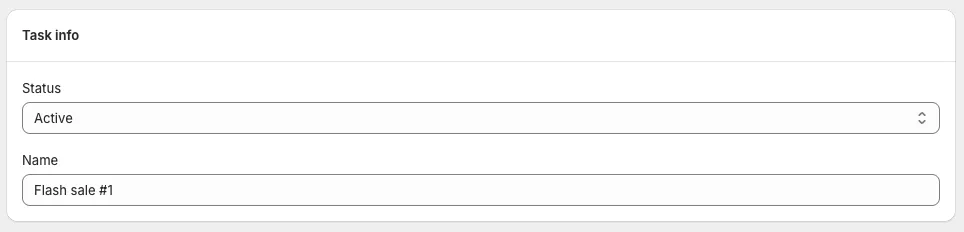
The task has four tabs: Basic info, Product & discount, Schedule and Display settings. The next steps follow them in order.
3. Choose your products
Section titled “3. Choose your products”Under Target items, pick what the sale applies to:
- All products
- Specific products
- Specific collections
- Tags
- Product types

For your first sale, choose Specific products and pick a handful, so the result is easy to check. The Free plan can target all products or specific products. Targeting by collection, tag or product type is on paid plans. More detail: Selecting products.
4. Set the discount
Section titled “4. Set the discount”Under Set price change rules:
- Choose which field the discount applies to: Price or Compare-at price.
- Choose how the discount is calculated, by percentage or by a fixed amount, and enter the value.
- Optional: tick Override cents to give every sale price the same charm price or price code ending, such as
.99or.97. - Work out one product’s sale price by hand, so you know what to expect on the storefront. For example, 30% off $80.00 is $56.00. The Preview on the right shows the widgets on a sample product. The prices in it are sample figures, not yours.

The screenshot shows 30% off the price, with every sale price ending in .85.
5. Choose what happens when the sale ends
Section titled “5. Choose what happens when the sale ends”Under Set revert rules, pick one option:
| Option | What it does |
|---|---|
| Revert to original price | Restores the original price. If the price was edited outside the app while the task was running, that edit is discarded. |
| Revert to the last price edited | Keeps a price that was edited outside the app while the task was running. The edited price is left unchanged when the task ends. |
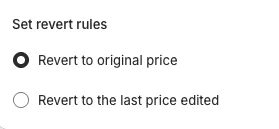
Full explanation: How price reverts work.
6. Schedule the sale
Section titled “6. Schedule the sale”On the Schedule tab:
- Choose One time schedule.
- Set the Start date and Start time.
- Tick Set end date, then set the End date and End time. This is the moment the task ends and prices revert. Without an end date the task stays active until you set its Status to Inactive.
- Optional: tick Display countdown timer to show a countdown on the product page. The countdown timer requires a paid plan.
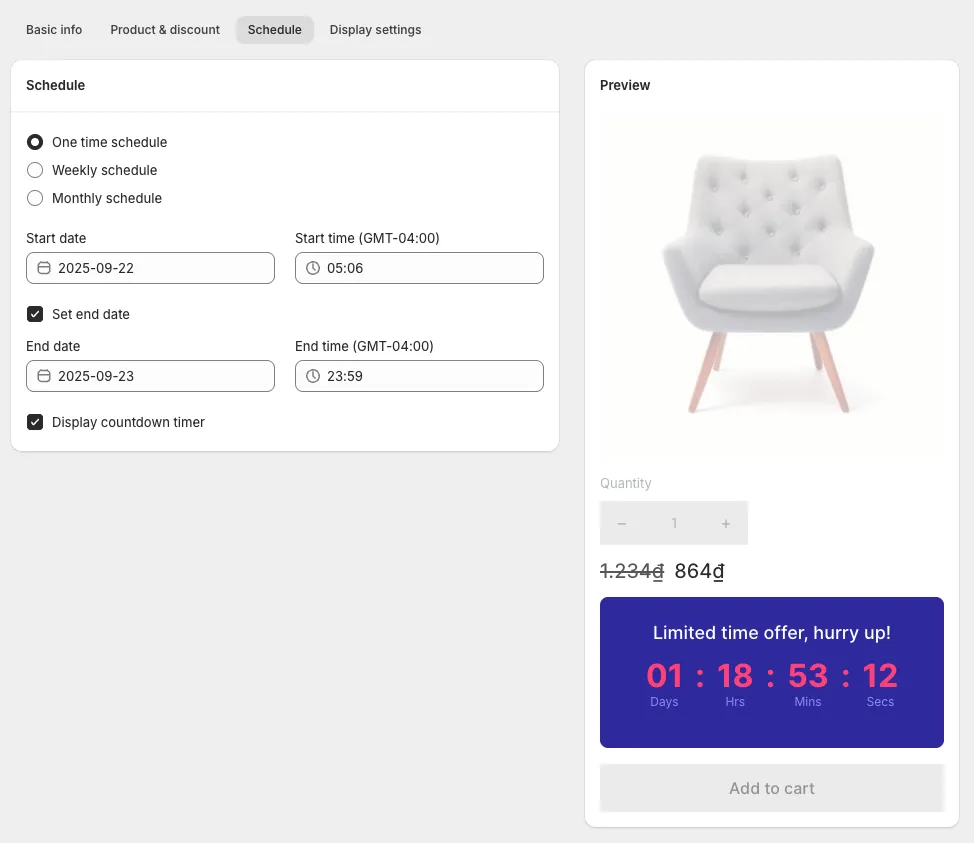
All times use your store’s time zone. On paid plans you can also choose Weekly schedule or Monthly schedule to make the task repeat: see Scheduling and recurring sales.
7. Activate and verify
Section titled “7. Activate and verify”- Check that Status is Active, then save the task.
- After the start time, open one of the products on your storefront and confirm the sale price.
- After the end time, open the same product and confirm the price has reverted.
A price change takes about 5 minutes for every 3,000 product variants, so allow for that before you check the storefront.
To end a sale early, set the task’s Status to Inactive.
Optional: add storefront widgets
Section titled “Optional: add storefront widgets”A Flash Sale task can show three widgets on the product page:
- A countdown timer, switched on with Display countdown timer on the Schedule tab.
- A stock progress bar, switched on with Display stock progress bar on the Display settings tab.
- A flash sale badge, switched on with Display flash sale badge on the Display settings tab.
The countdown timer and the stock progress bar need the app’s embed to be switched on in your theme. If any widget does not show, check the app embed first.
Pre-launch checklist
Section titled “Pre-launch checklist”- You know the sale price to expect on one product, so you can check it on the storefront after the start time.
- Set end date is ticked, and the end date and time are right for your store’s time zone.
- The revert rule is the one you intend.
- No other task starts or ends at the same time, and no product is in two active tasks. See Staggering tasks.
- Your margin works at the sale price.
- The app embed is on if you want the countdown timer or stock progress bar to show.