Flash Sale tasks
A Flash Sale task discounts the products you choose for a set period and reverts their prices when the task ends. It does this by changing each product’s price and compare-at price. It does not create a discount code. You create it from the Run flash sale card on the app dashboard, and in most themes the product shows the original price with a strikethrough next to the sale price while the task is active. Shoppers see the savings on the product page, before the cart.
For price changes that should not look like a sale, use a Price Edit task instead.
Settings at a glance
Section titled “Settings at a glance”A task is set up across four tabs: Basic info, Product & discount, Schedule and Display settings.
| Tab | Setting | What it controls |
|---|---|---|
| Basic info | Status | Active turns the task on and Inactive turns it off |
| Basic info | Name | A label for your task list. Shoppers never see it. |
| Product & discount | Target items | All products, specific products, specific collections, tags or product types |
| Product & discount | Set price change rules | The field the discount applies to (Price or Compare-at price), and the discount as a percentage or a fixed amount |
| Product & discount | Override cents | Sets the same charm price or price code ending, such as .99, on every product’s price |
| Product & discount | Set revert rules | Revert to original price or Revert to the last price edited |
| Schedule | Schedule type | One time schedule, Weekly schedule or Monthly schedule |
| Schedule | Display countdown timer | Shows the countdown timer for this task |
| Display settings | Display stock progress bar | Shows a stock bar on the product page |
| Display settings | Display flash sale badge | Shows a badge on the product, with template, colours, font size and position |
Create a Flash Sale task
Section titled “Create a Flash Sale task”-
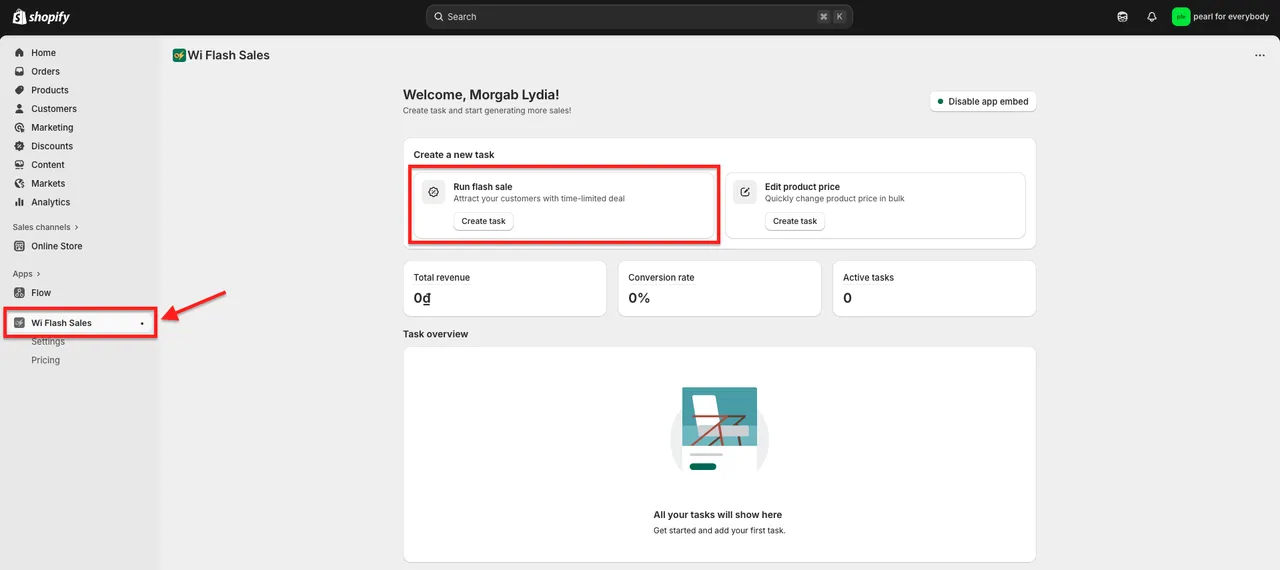
Open the app from your Shopify admin. On the dashboard, find the Run flash sale card and click Create task.
-
In Task info, enter a Name and set the Status. Active means the task is on and Inactive means it is off. The name is only for your own task list, so make it easy to recognise, for example
BFCM - outerwear - 30%.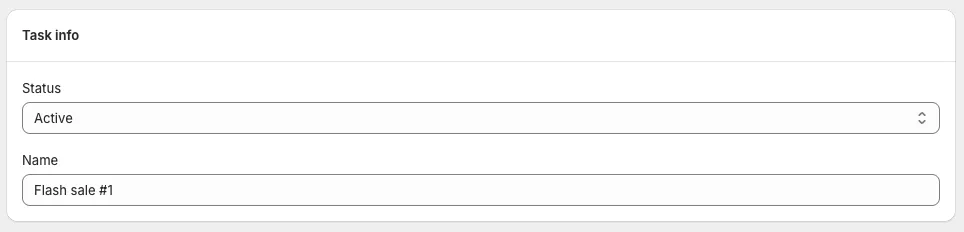
-
In the Configuration card, choose the Target items: all products, specific products, specific collections, tags or product types. Collections, tags and product types need a paid plan. See Selecting products.

-
Under Set price change rules, choose the field the discount applies to and enter the discount, as a percentage or a fixed amount. Optionally tick Override cents. Details are in Discount settings below.
-
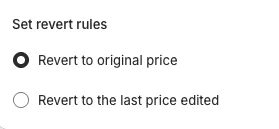
Under Set revert rules, choose what prices return to when the task ends.
-
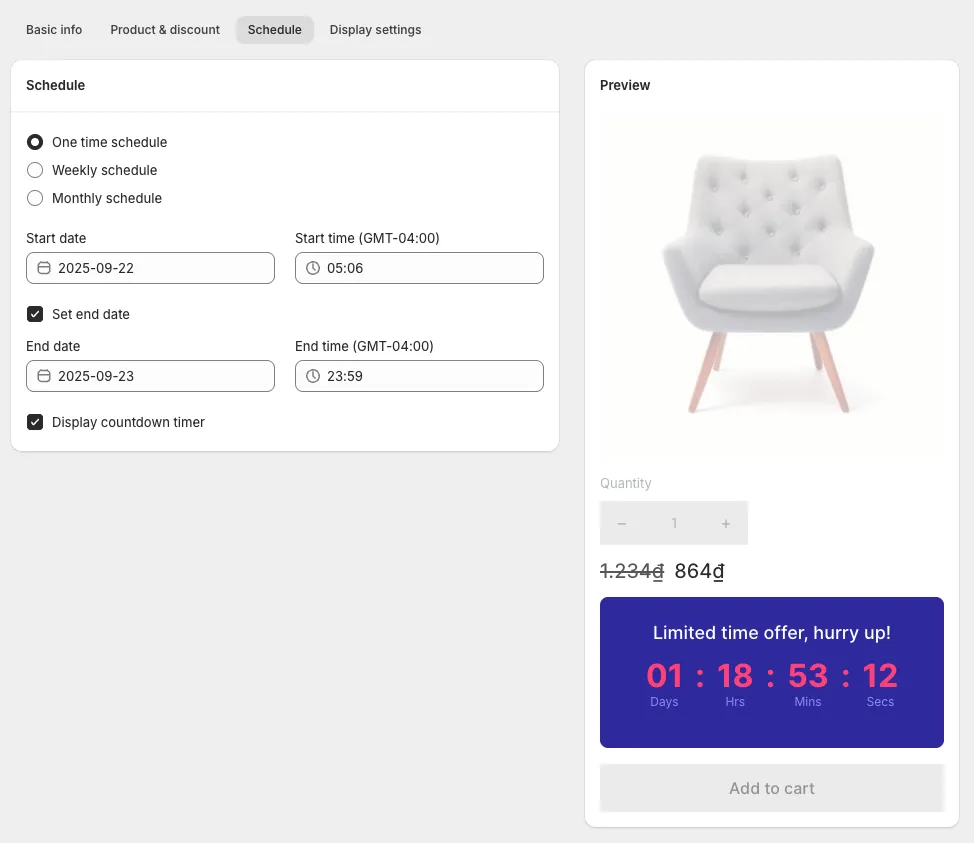
On the Schedule tab, set the start date and time and, with Set end date ticked, the end date and time. Tick Display countdown timer if you want the timer on the product page.
-
On the Display settings tab, switch on the stock progress bar and the flash sale badge if you want them.
-
Save the task. With Status set to Active, it starts at the scheduled time.
Discount settings
Section titled “Discount settings”Price or compare-at price
Section titled “Price or compare-at price”The first dropdown under Set price change rules decides which field the discount is calculated from: Price or Compare-at price. The result is different in each case, so check it against the examples below. Each example uses a 50% discount.
| You choose | Product before the task | Product during the task |
|---|---|---|
| Price | Price $320, no compare-at price | Price $160, compare-at price $320 |
| Price | Price $320, compare-at price $500 | Price $160, compare-at price $320 |
| Compare-at price | Price $320, compare-at price $500 | Price $250, compare-at price $500 |
| Compare-at price | Price $320, no compare-at price | Price $320, compare-at price $640 (a new compare-at price is added, at a price the product never sold at) |
What to take from the table:
- Price calculates the discount from the product’s original price. The original price becomes the compare-at price for the length of the task. If the product already had a compare-at price, that old value returns after the task ends.
- Compare-at price calculates the discount from the product’s original compare-at price.
- With Compare-at price on a product that has no compare-at price, the price the shopper pays does not go down. A new compare-at price is added instead.
Discount value and override cents
Section titled “Discount value and override cents”Enter the discount next to the field you chose. A Flash Sale discount can be a percentage or a fixed amount. To give every sale item a charm price (such as .99) or a price code (such as .97), tick Override cents and enter the ending every product’s price should have.
The example below sets 30% off the price, with every price ending in .85.

Override cents changes the real discount. The app first calculates the discounted price from your percentage or amount, then replaces the cents with the ending you entered. A product at $100.00 with 15% off is $85.00, and with .99 it becomes $85.99, a real discount of about 14%. An ending lower than the calculated cents makes the discount deeper instead. The flash sale badge still shows the discount as you entered it, so a 15% badge can sit on a product that is really about 14% off. The gap grows on low prices: a $10.00 product at 40% off is $6.00, and with .99 it becomes $6.99, about 30% off under a 40% badge. If the exact discount matters, for example for an advertised percentage, leave Override cents unticked.
Our advice: use the ending the rest of your store uses. Mixed endings such as $34.72 next to $19.99 make a collection page look unplanned.
Revert rules
Section titled “Revert rules”Under Set revert rules, decide what happens to prices when the task ends:
- Revert to original price: restores the original price. If the price was edited outside the app while the task was running, that edit is discarded.
- Revert to the last price edited: keeps a price that was edited outside the app while the task was running. The edited price is left unchanged when the task ends.
The revert covers both the price and the compare-at price. See How price reverts work for worked examples, including what happens when several tasks change the same product.
Schedule
Section titled “Schedule”Every schedule runs in your store’s time zone. There are three schedule types:
- One time schedule: a start date and time, and an end date and time. The end date is optional. A task with no end date stays active until you set its Status to Inactive, which reverts the prices.
- Weekly schedule (paid plans): a start day and time and an end day and time, repeated every week.
- Monthly schedule (paid plans): a start date and time and an end date and time, repeated every month.
Full steps and examples: Scheduling and recurring sales.
Display settings
Section titled “Display settings”These are optional. They add urgency on the product page.
-
Countdown timer: tick Display countdown timer on the task’s Schedule tab. The countdown timer requires a paid plan, and the timer needs the app embed switched on in your theme.
-
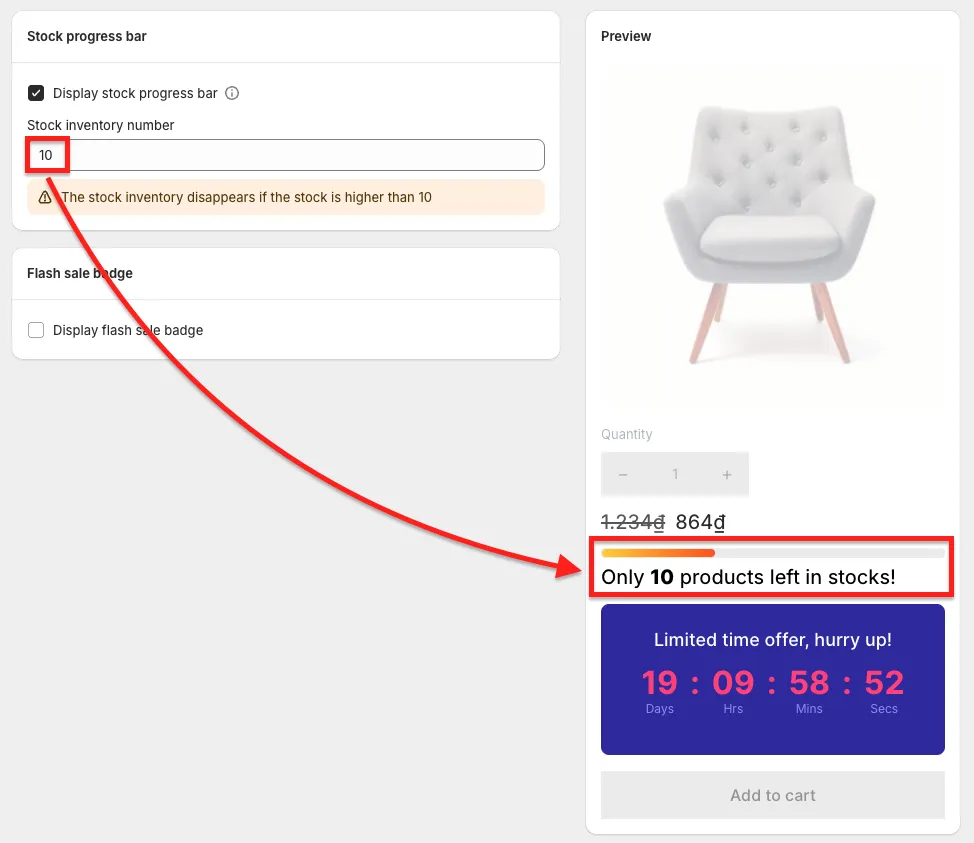
Stock progress bar: tick Display stock progress bar and enter the Stock inventory number. The bar needs the app embed switched on in your theme. It shows while the product still has stock and that stock is no higher than the Stock inventory number. It is hidden when the product is out of stock, and when the stock is higher than the number you entered.
-
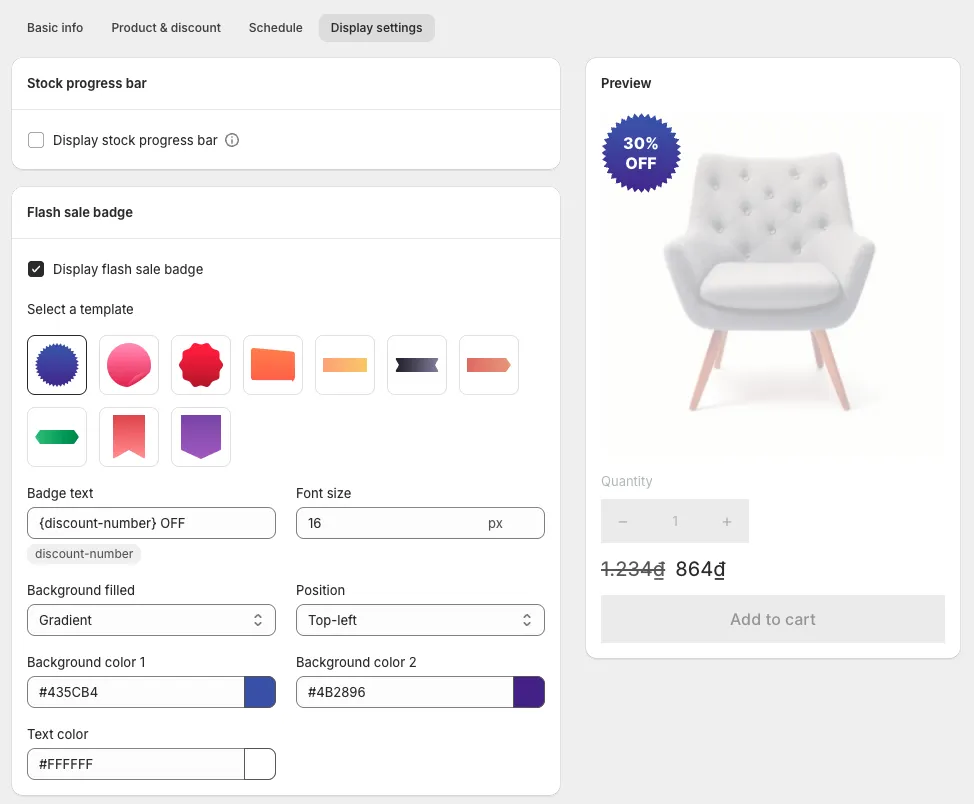
Flash sale badge: tick Display flash sale badge, then choose the template, badge text, font size, position and colours.
If a widget does not show on your storefront, check the app embed first.
Preview and checking the price
Section titled “Preview and checking the price”The Preview on the right shows how the stock progress bar, the flash sale badge and the countdown timer will look. It uses a sample product and image, not your theme or your own products. The prices in it are sample figures, so it is a check of the widgets and not of your sale price.
Our advice: before a large sale, check the price with a test task.
- Run the task on one or two products.
- Open them on your storefront and check the price and the strikethrough price.
- Set the test task to Inactive and confirm the prices have reverted.
- Then run the full task. The test products are live at the sale price while the test runs, and a product left in two active tasks gets both discounts.
A discount on the wrong field is much cheaper to catch on two products than on two thousand.
Turning a sale off early
Section titled “Turning a sale off early”Set the task Status to Inactive and save. Prices revert according to the revert rule you chose. This is the same revert that runs when a task reaches its end date.
A task’s status tells you where its prices are. A task is Inactive before its prices have been applied. It is Active once they are applied, and Inactive again once they have been reverted. On the task’s details page, the Status dropdown has two options, Active and Inactive. Changing it to Inactive triggers the revert.

Good to know
Section titled “Good to know”- Limits. Paid plans have no variant limit. The Free plan covers 50 product variants in total across your active tasks. See Plans and limits.
- Processing time. For every 3,000 product variants, it takes about 5 minutes to run the price change.
- Several tasks at once. Several tasks can be active at the same time. Keep each product in one active task at a time: a second Flash Sale task stacks on the first, and reverting it undoes both. Give each task its own start and end time, because a task can get stuck if two start or end together. See Staggering tasks.
- Collections. Do not target an automated collection whose conditions include price. The discount can move products out of the collection, and the task then cannot find them to revert. The same applies to products you remove from a targeted collection while the task is running. See Tasks on automated collections.