Countdown timer settings
The countdown timer is a box on the product page that tells shoppers how much time is left to buy at the sale price. To show it, tick Display countdown timer on the task’s Schedule tab and make sure the app embed is on. The countdown timer requires a paid plan. You can change its heading, sizes, colours and time labels.
Where and when it appears
Section titled “Where and when it appears”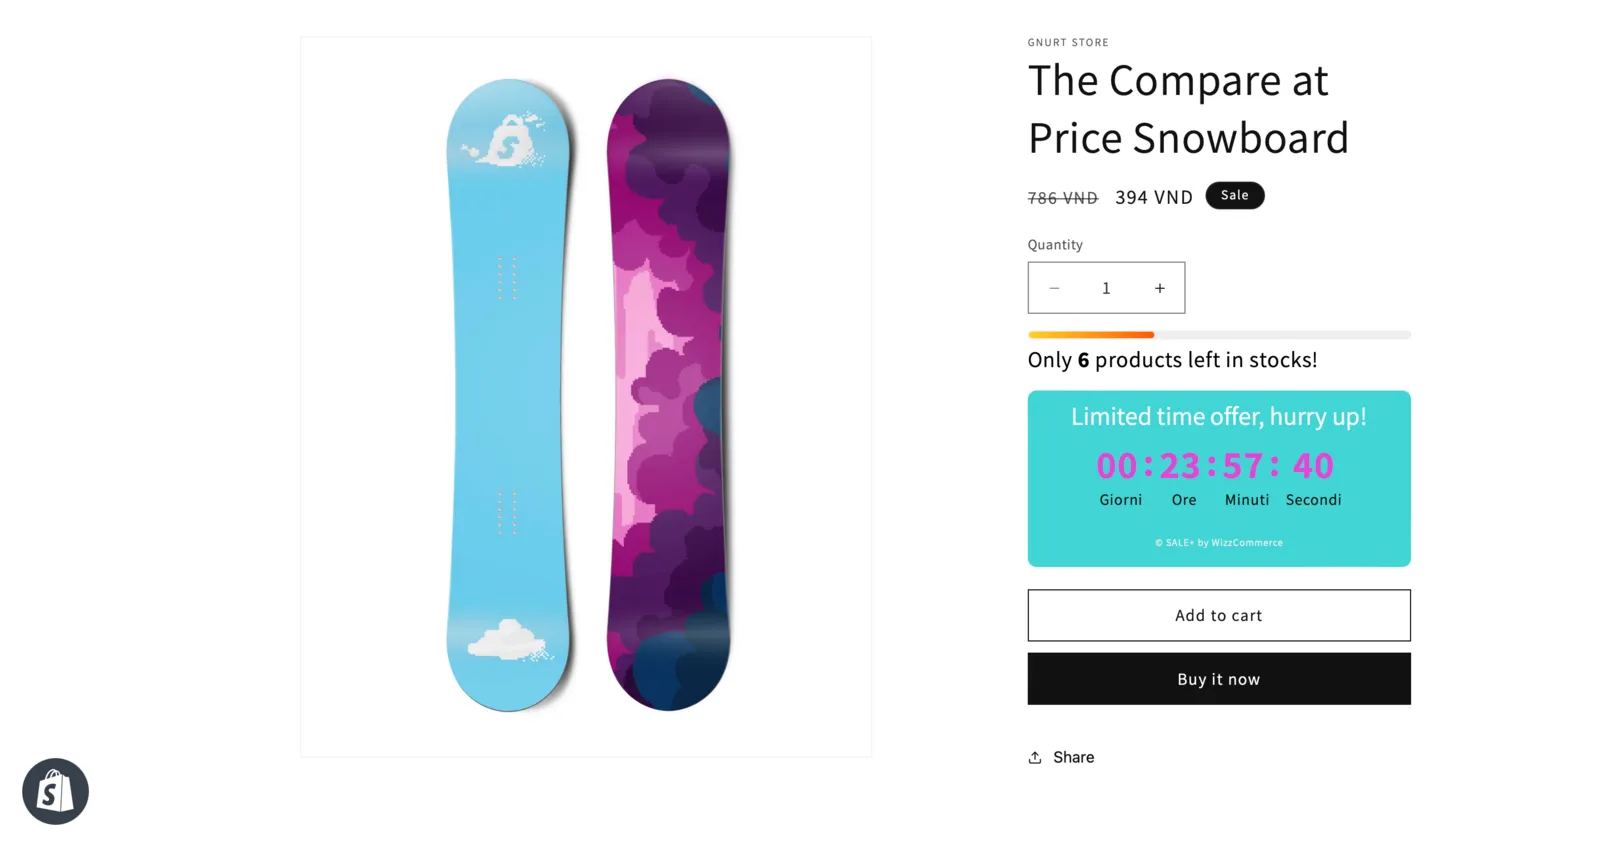
- On product pages only
- On products in a Flash Sale task that has Display countdown timer ticked
- Only when the app embed is enabled
Turn the timer on for a task
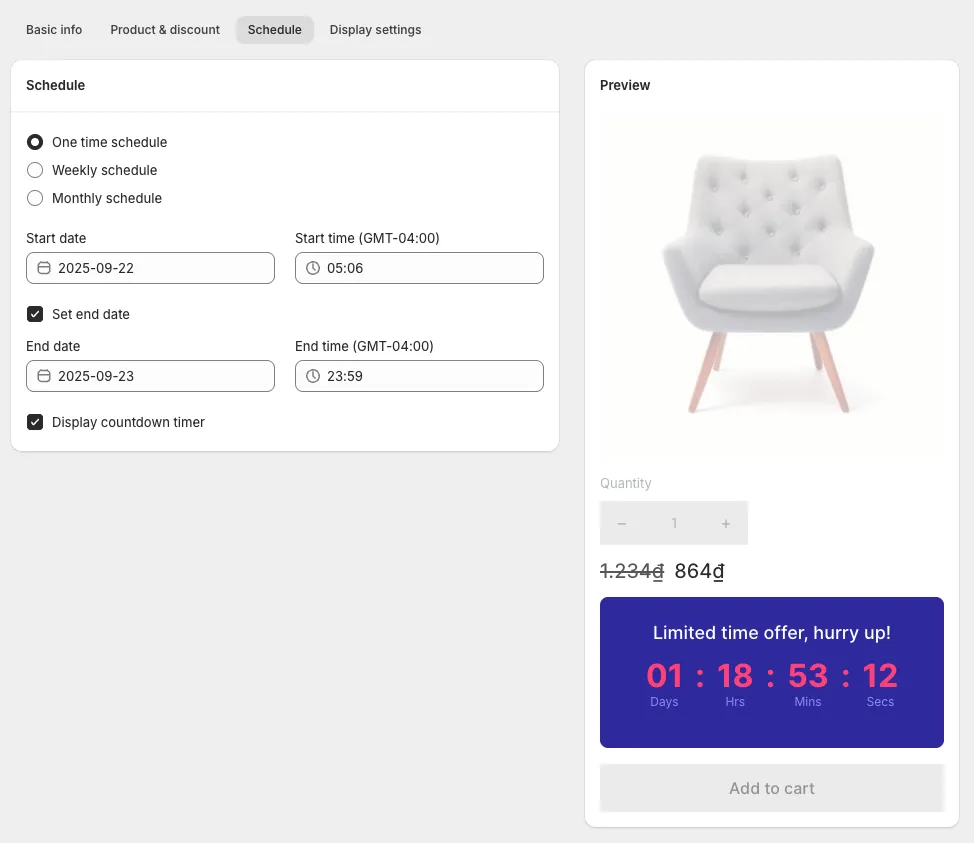
Section titled “Turn the timer on for a task”- Open the task and go to the Schedule tab.
- Select One time schedule and set the start date and time.
- Tick Set end date and choose the end date and time. Times use your store’s time zone. On a one-time schedule the timer counts down to this end time.
- Tick Display countdown timer.
- Check the Preview on the right, then save the task.
Customise the timer
Section titled “Customise the timer”The countdown timer needs a paid plan, and customising it is included in the plans that have it.
-
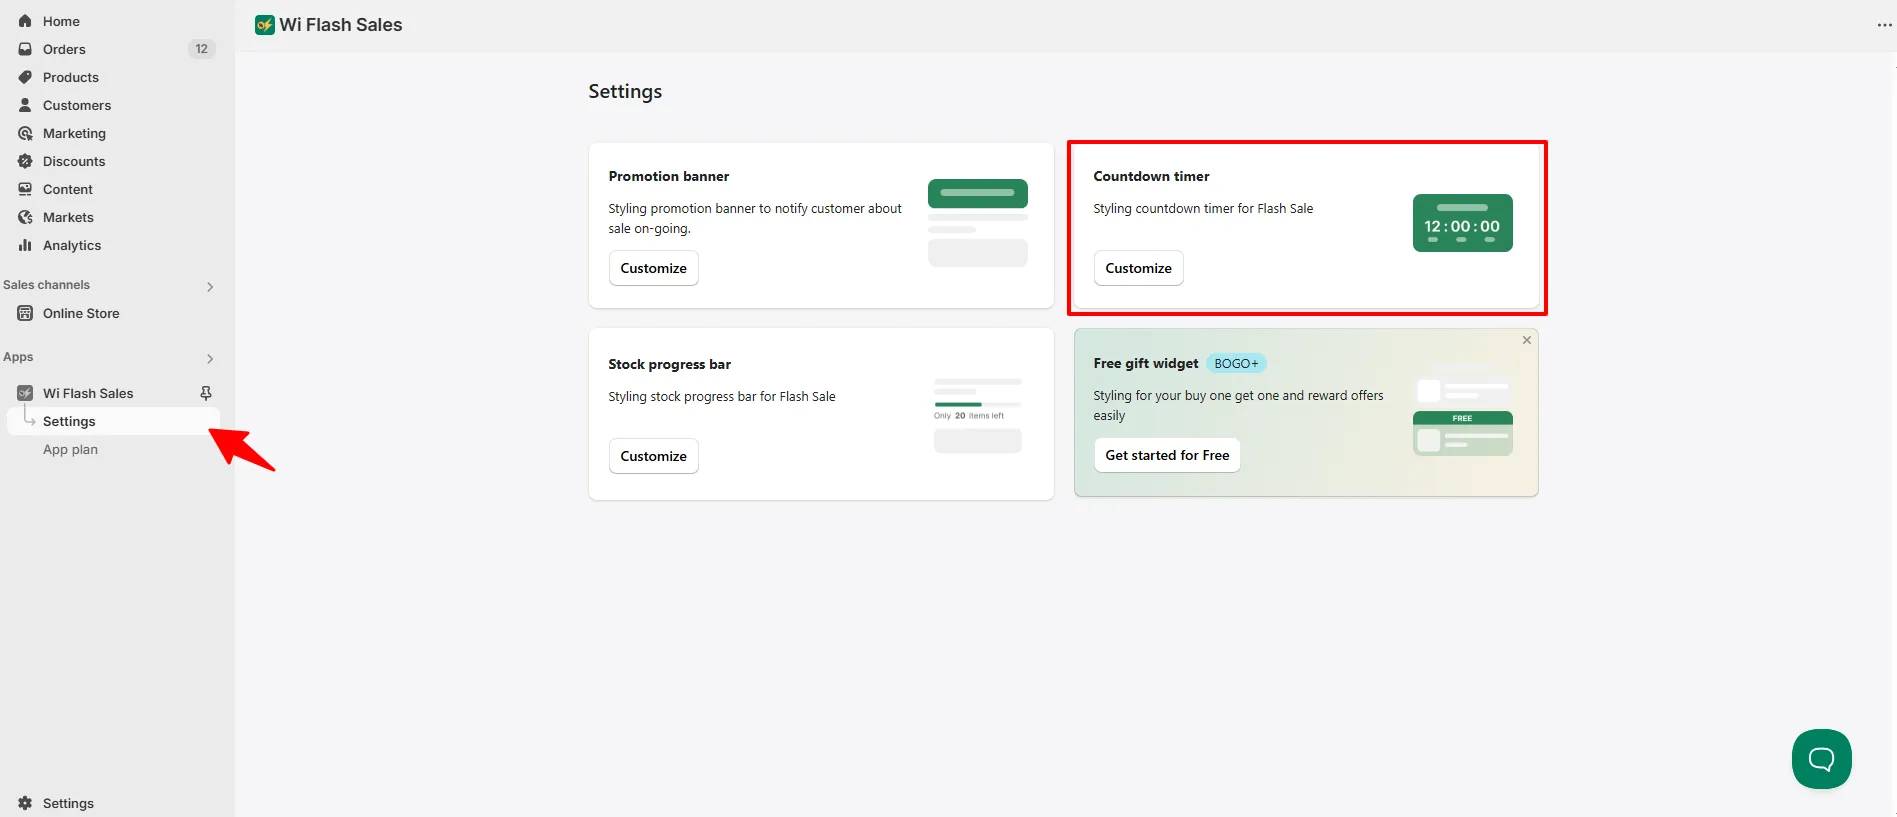
In the app menu, open Settings.
-
On the Countdown timer card, click Customize.
-
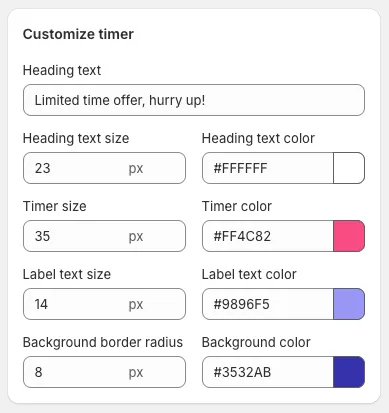
Under Customize timer, write the Heading text and set the sizes and colours to match your theme.
-
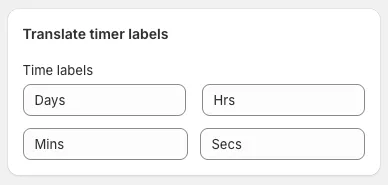
Under Translate timer labels, change the Time labels (Days, Hrs, Mins, Secs) if your store is not in English.
-
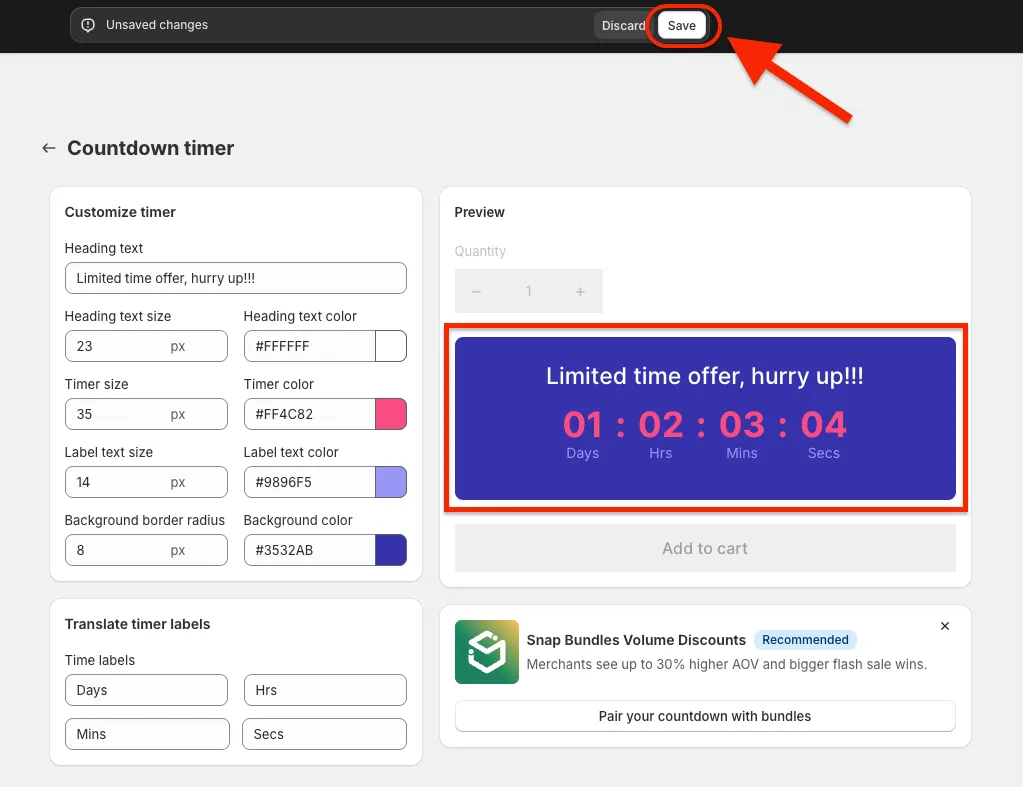
Check the Preview on the right side of the page.
-
Click Save.
What you can customise
Section titled “What you can customise”| Group | Settings |
|---|---|
| Content | Heading text, for example “Sale ends in” |
| Size | Heading text size, Timer size, Label text size, Background border radius |
| Colour | Heading text color, Timer color, Label text color, Background color |
| Language | Time labels: Days, Hrs, Mins, Secs |
Tips: writing a heading that works
Section titled “Tips: writing a heading that works”These are our suggestions, not app settings. Keep the heading short and say what happens at zero.
| Instead of | Try |
|---|---|
| Hurry!!! | Sale ends in |
| Limited time offer | This price ends in |
| Do not miss out | Price goes back up in |
Tip: keep the deadline honest
Section titled “Tip: keep the deadline honest”A countdown only works when the deadline is real. Do not extend a sale after the timer has run out: shoppers who saw the deadline learn that it was not real. Rules on misleading urgency differ by country.
What happens when the timer reaches zero?
Section titled “What happens when the timer reaches zero?”The revert starts at the task’s end time. Applying it to your products in Shopify takes time, so a sale price can stay on a product a little after zero, and longer on a large task. Spot-check a few products after the end time, because a sale price left on costs you margin.
The timer is not showing
Section titled “The timer is not showing”Check these in order:
- Plan: the countdown timer requires a paid plan. See Plans and limits.
- App embed: is it on for the live theme? See Enable the app embed.
- Task setting: is Display countdown timer ticked on the task’s Schedule tab?
- Task status: is the task Active, started and not yet ended?
- Product: is this product in the task?
- Page: the timer only appears on product pages.
Still stuck? Email support@pricedip.app.
Related
Section titled “Related”- Promotion banner for a timer in a banner at the top of pages
- Sale badge and countdown timer
- Stock progress bar
- PriceDip: schedule price changes and flash sales