Promotion banner
The promotion banner is a bar at the top of every page of your store, except the checkout page, that tells customers about a promotion. It can show a message, a countdown timer and a call-to-action button, in any combination.
The banner needs the app embed to be on. It is set up in the app’s Settings, with its own status and schedule, and is not part of a task.

Three banner types
Section titled “Three banner types”| Type | Shows | Turn it on with |
|---|---|---|
| Banner with text | A message | Status set to Active |
| Banner with timer | A message plus a countdown | Enable schedule, then Enable timer |
| Banner with call to action | A message plus a button | Enable call to action |
These build on each other. A banner can have a message, a timer and a button at the same time.
Set up a text banner
Section titled “Set up a text banner”-
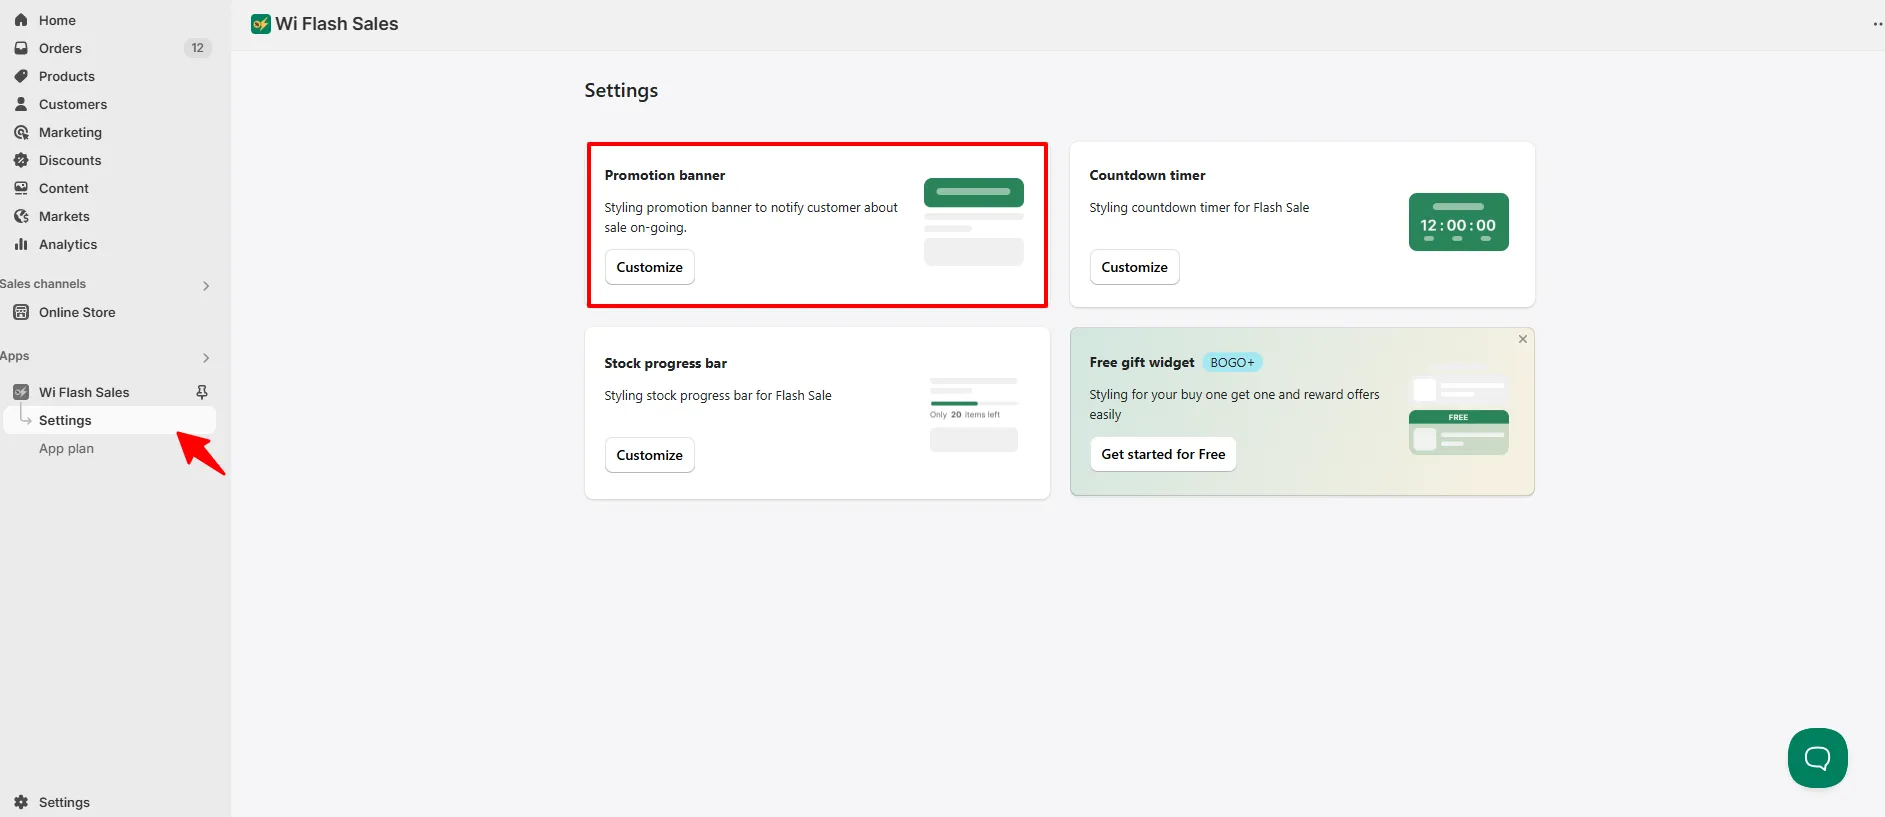
In the app menu, open Settings.
-
On the Promotion banner card, click Customize.
-
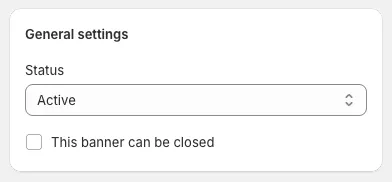
Under General settings, set Status to Active. Tick This banner can be closed if customers should be able to dismiss it.
-
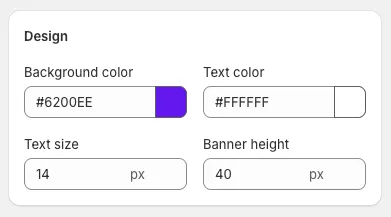
Under Design, set the Background color, Text color, Text size and Banner height.
-
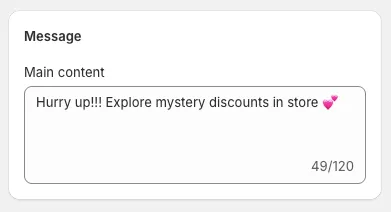
Under Message, write the Main content. The field holds up to 120 characters.
-
Check the preview on the side, then save.
Add a countdown timer
Section titled “Add a countdown timer”The banner timer needs a paid plan. The banner itself is on every plan.
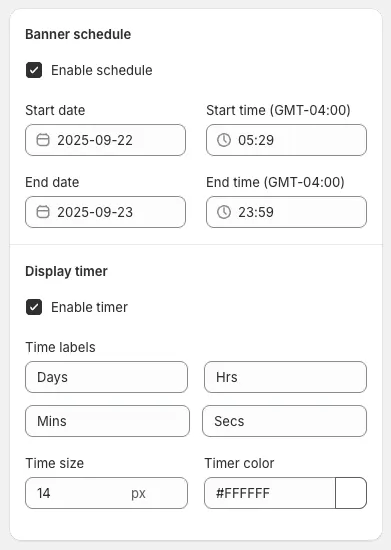
- Under Banner schedule, tick Enable schedule.
- Choose the Start date and Start time, when the banner appears, and the End date and End time, when it disappears. The timer counts down to the end.
- Under Display timer, tick Enable timer. A timer appears in the preview.
- Translate the Time labels (Days, Hrs, Mins, Secs) if needed.
- Adjust the Time size and Timer color.
Add a call-to-action button
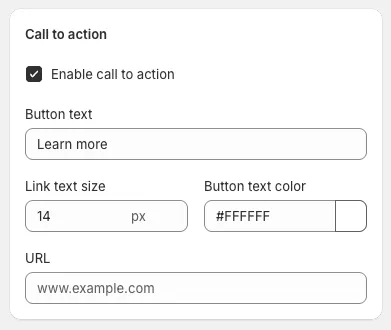
Section titled “Add a call-to-action button”- Under Call to action, tick Enable call to action.
- Enter the Button text, such as
Shop the sale. - Set the Link text size and Button text color.
- Paste a valid link into the URL field. The sale collection is usually the best destination.
All settings
Section titled “All settings”| Group | Settings |
|---|---|
| General settings | Status, This banner can be closed |
| Design | Background color, Text color, Text size, Banner height |
| Message | Main content, up to 120 characters |
| Banner schedule | Enable schedule, Start date and time, End date and time |
| Display timer | Enable timer, Time labels, Time size, Timer color |
| Call to action | Enable call to action, Button text, Link text size, Button text color, URL |
Tips: writing a banner that gets read
Section titled “Tips: writing a banner that gets read”These are our suggestions.
- Lead with the offer. “30% off outerwear” beats “Our biggest sale is here”.
- Add the deadline. Use the timer, or say “ends Sunday”.
- Use one action. One button, one destination.
- Be brief. The message field stops at 120 characters, and a shorter line is easier to read on a phone.
The banner is not showing
Section titled “The banner is not showing”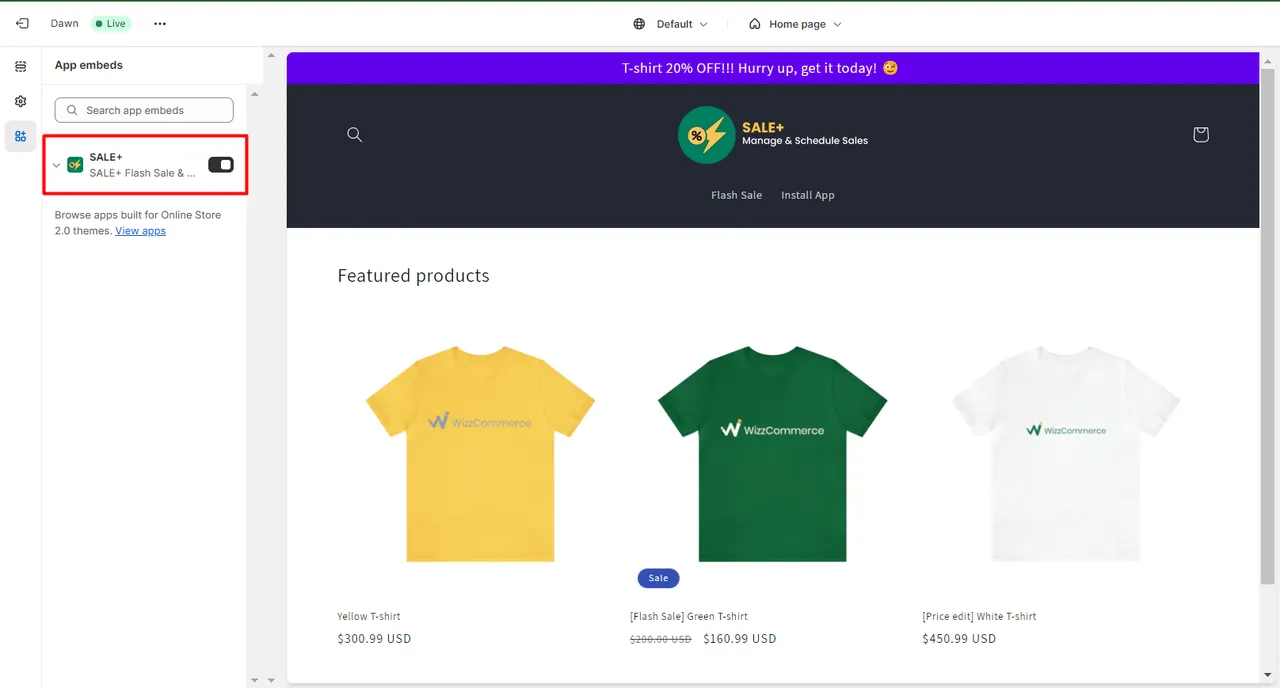
- Is Status set to Active?
- Is the app embed on for the live theme?
- If you ticked Enable schedule, is it currently between the start and the end?
The banner does not appear on the checkout page. That is expected.
Still stuck? Email support@pricedip.app.